Quick introduction
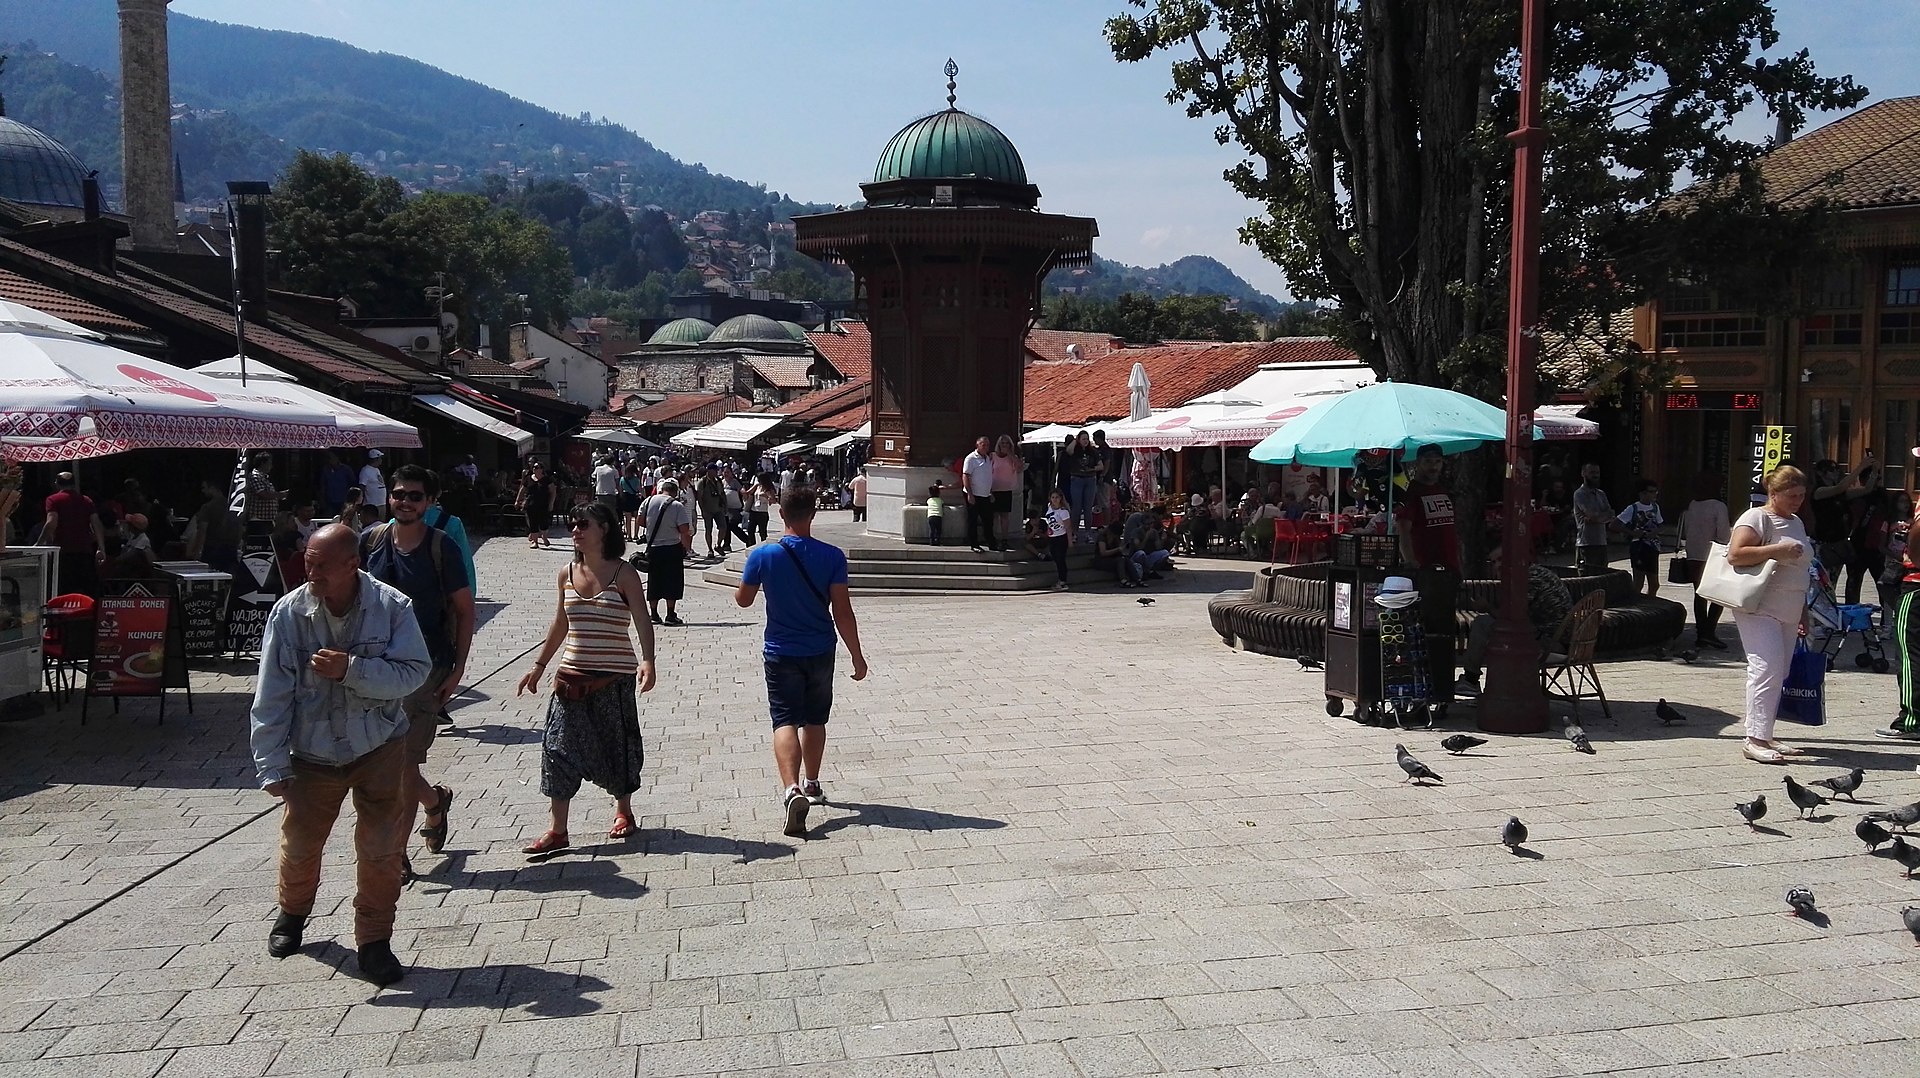
Baščaršija is the Ottoman bazaar at the heart of Sarajevo and has been operating since the 15th century. The copper craftsmen, coffee houses, and the Sebilj wooden fountain still give it a working character rather than a museum atmosphere. The best approach is to arrive without a specific plan — the square is compact enough that you find the main points without effort. Ćevabdžinica Petica Murića (known as Petica) and Ćevabdžinica Željo are the two names that come up most often for ćevapi. Both are small, basic, and very good. A plate of ten ćevapi with somun bread costs around 8-10 BAM (€4-5).
Walking west from Baščaršija, the streets shift into the Austro-Hungarian quarter built after 1878. The architecture changes completely — Vienna-era facades, the old post office building, and the Latin Bridge where Archduke Franz Ferdinand was assassinated in 1914. The short walk between the two zones makes Sarajevo's layered history feel physically immediate in a way few European cities can replicate. Some blocks still show war damage from the 1990s siege, left unrepaired as deliberate markers.
The Yellow Fortress (Žuta Tabija) is the best viewpoint in the city. The walk takes about 15 minutes from Baščaršija and the sunset view over the minarets and valley is consistently cited as one of the best in the region — and it is free. The Tunnel of Hope Museum (Tunel D-B) on the southwestern edge of the city documents the underground passage used to supply the city during the 1992-1995 siege. It is about 8km from the center and worth the trip for anyone with more than two nights.
Still deciding if Sarajevo is the right base overall? Open the full Sarajevo destination guide first, then come back here to compare neighborhoods and properties.
Best neighborhoods
Bascarsija
Bascarsija is the Ottoman bazaar quarter and the atmospheric heart of Sarajevo. Staying here means the best cevapi spots, the covered market, the mosques, and the evening cafe scene are within a 10-minute walk. Hotels and guesthouses in this area cost 50 to 100 EUR per night. Best for: first-time visitors, food-focused travelers, couples, and anyone who wants the most atmospheric version of the city.
Marijin Dvor
Marijin Dvor is the modern hotel zone along the main avenue, roughly 15 to 20 minutes walk from Bascarsija. It has larger, more standardized hotels and better transport connections. Prices run 80 to 140 EUR per night. Best for: business travelers, transit stays, and anyone who prefers standard hotel facilities over old-town character.
Skenderija
Skenderija is a transitional area between the old town and the modern centre, near the Miljacka river. A practical middle ground for travelers who want old-town proximity without being in the busiest streets. Accommodation runs 55 to 90 EUR per night. Best for: travelers who want balance between atmosphere and practical access.
Mejtas
Mejtas is a quieter residential neighborhood close enough to the centre for easy walking. More local in feel and slightly lower in price than the main hotel zones. Apartments cost 45 to 75 EUR per night. Best for: longer stays and travelers who want a genuinely residential Sarajevo experience.
How to choose the right base in Sarajevo
The best place to stay in Sarajevo depends less on star rating and more on the shape of the trip. If you want atmosphere first, staying near Bascarsija is often the cleanest answer. If you care more about sleep quality, easier arrivals, or slightly better value, Marijin Dvor or a comparable nearby area usually works better. The goal is not to book the objectively best hotel. The goal is to book the base that matches your pace.
Common booking mistakes to avoid
The most common mistake is choosing a property only because the nightly rate looks attractive, while ignoring how the location changes the trip. In Sarajevo, that often leads to extra transfers, weaker evening atmosphere, or a stay that feels less aligned with the reason you chose the city in the first place. A second common mistake is leaving the booking too late, especially if the most useful neighborhoods only have a handful of strong-value options.